There are many options for integrating ads into Wordpress, the solutions for which will vary depending upon your particular needs, but for most scenarios there are a few key points you will want to hit:
- Dynamic ads that will change between each page load so you don't see the same ad in the same place all the time.
- Easily editable ads. You want to be able to swap ads in and out at a moment's notice.
- Support for plain images and links, as well as code snippets like the kind generated by Google AdSense.
Step 1: Download and install the plugin.
Fortunately, there is a Wordpress plugin that not only takes care of each of the above needs, but has the capability of doing far more. It is called Simple Ads Manager, and will allow you to manage and display your ads throughout your Wordpress site. It is available here.
For the purposes of this tutorial we will only be using its basic functionality.
Further documentation for the *Simple Ads Manager* plugin is available at the developer's website, and I heartily recommend it for shortcode reference.
Once you have downloaded the plugin, you may install it onto your server via the "Plugins" -> "Add New" menu item in the Wordpress administration interface. If this is your first rodeo, here are the official Wordpress instructions on managing plugins.
Step 2: Identify where you will be displaying ads.
Planning where you are going to put the ads is one of the most important steps. Ads come in all shapes and sizes and you will want to plan accordingly to maximize impact and space, without losing the existing look of your site.
Google AdSense provides a helpful list of the most common ad sizes they support.
For our purposes, we will be setting up a "Leaderboard" space (728x90px).

Step 3: Set up the default Ad Places.
"Ad Places" are essentially categories for your ads. You can title them, note the size of the ads that you will be placing in them, and specify a default ad.
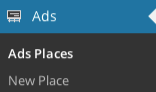
Go to "Ads" -> "New Place" to begin creating our "Leaderboard" ad place. We will title it "Leaderboard", give it a brief description, and set the size to 768x90 pixels.
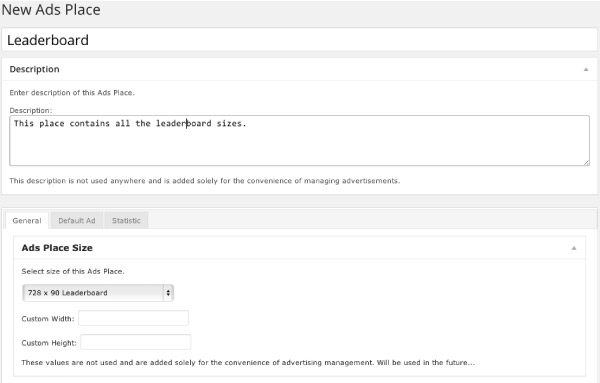
Then, click on the "Default Ad" tab to set which ad will display only if no other ads have been assigned to this "Ad Place".
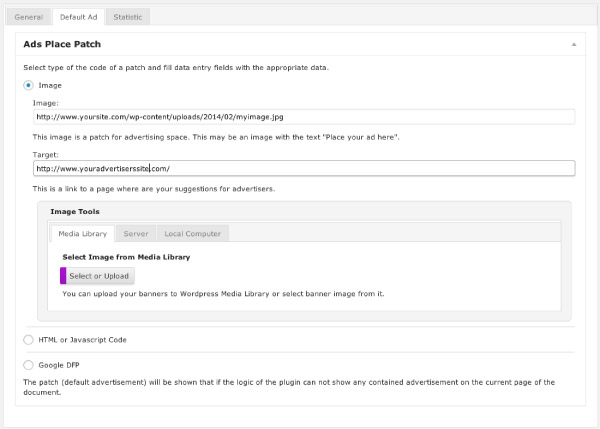
Using an image as an ad
If you are using a static image, simply select or upload an image to your media gallery (which will auto-populate the first field with the absolute URL of the image) and the link where you want the user to be directed to when they click the ad.
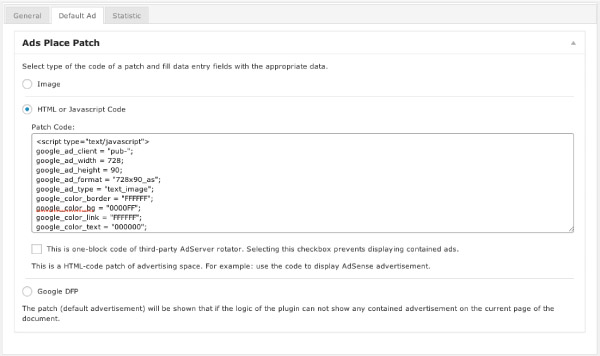
Using HTML/Javascript code as an ad (Google AdSense)
If you have code given to you by a 3rd-party, such as Google AdSense, you will want to use the HTML/Javascript option. All you have to do is click on the radio button next to "HTML or Javascript Code" and paste your code into the text area field.
The checkbox that says, "This is a one-block code…" allows you to override any ads that you later assign to this "Ad Place" and instead always display the default ad. You can safely leave this unchecked.
When you are finished editing your Ad Place, you can click on "Save" in the upper right hand area of the page.
Step 4: Inserting ads into your rotation.
Now that our Ad Place is set up, we can insert the ads that will dynamically be displayed on each page load. We create a new ad by going to "Ads" -> "Ad Places" in the admin menu, hovering over the Ad Place we want to use, and clicking "New Ad".
You will now be able to set the title of the ad, add a brief description, and select either the image or HTML/Javascript options, just like we did the default ad. There are 4 other tabs available, which allow you to set extra restrictions on the ad, but they can be safely ignored for the scope of this article. Once you are done, click on "Save" and this ad will now be in rotation.
Step 5: Display the ads on your website.
Our Ad Place is ready to go, now all we have to do is make it show up on the website.
Use the "Ads Place" widget
Lucky us! The plugin comes with an "Ads Place" widget, which we can simply assign to the desired module position.

Use the Simple Ads Manager shortcode
You can also use a shortcode to display the Ad Place. You can insert this shortcode into any posts or pages on your website:
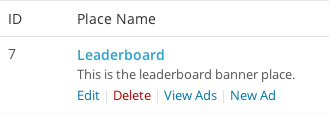
[sam id=7]
Where the "id" is the id of the Ad Place we want to use, which can be found from the "Ads" -> "Ads Places" menu item (in this case, our is 7).
If you are a little more code-savvy, you can also insert this shortcode directly into your theme (which may require you to use the do_shortcode function)
Other shortcodes are available to display individual ads (and more), which can be found towards the bottom of the developer's website.
Step 6: Congratulate yourself.
That's it! You have successfully created an Ad Place, added ads to it, and set them to show up on your website. Well done!
Are you interested in generating ad revenue for your site from ad networks and paid advertisers? Contact us below, today!

Harrison Okins is a California-based web designer/developer who spends his time creating beautiful and functional things. He also thoroughly enjoys laser tag and typography.
 Email
Email Facebook
 LinkedIn